The Lithology Catalog
A built-in, default lithology catalog is available in the JewelSuite Geomechanics application. With the Lithology Catalog form (HOME > Settings) you can view this catalog, create new lithology definitions and modify the existing (default) definitions.
When you edit the default catalog, you can save it for the project/solution, or you can save it for the application, so that each new solution will make use of your saved catalog.
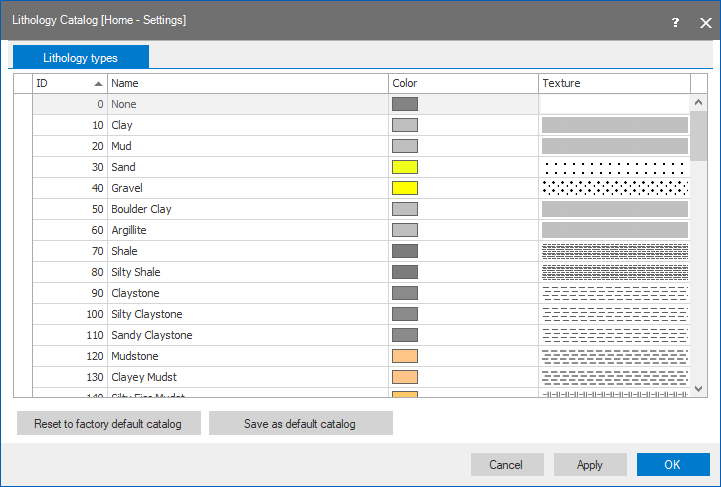
In the Lithology types tab of the Lithology Catalog form you can define and update lithology templates. The form shows the IDs and associated names of the lithologies and their identifying color. In the Texture column you can add a graphical representation of the lithology. This texture can be displayed on 2D grids, tri-meshes and 3D grids in the 3D View and in the Well View.
You can add a user-defined lithology to the Lithology Catalog by scrolling to the end of the list of pre-existing lithologies and entering an ID, name and color (and optionally texture) in the corresponding columns.
To display Texture
- On the Lithology Catalog form, Lithology Types tab, click in the Texture cell of the required Lithology type, click the selection button at the right in the cell. The browser will by default open in the directory in which the texture images reside, if not, browse to C:\users\user\AppData\Local\BakerHuges\LithologyTextures where you find images of the texture patterns of the most common rock types. If you need another image you can add it here. Select one of the texture images and click Apply on the Lithology Catalog form. Keep the Lithology Catalog form open as you need the lithology ID in step 3.
- In the JewelExplorer, right click the property to which you want to assign a texture (note that the property has to be a discrete property, such as lithology or facies) and select Properties > Edit classes. The Discrete Property Class Editor form opens.
- In the column ID, enter the ID of the lithology as shown in the Lithology Catalog. Use subsequent rows to add more lithologies if needed.
- Click OK and close the Lithology Catalog form.
- In the JewelExplorer, select the property, then open the Property Inspector and set Graphics / Use textures to True.
The textures are displayed.
Options at the base of the Lithology Catalog form
With these options you can reset or save any edits you made.
Reset to factory default catalog This discards any changes and resets the Lithology Catalog back to its original, default definitions (both the application and project catalog).
Save as default catalog This makes the current definitions and templates the default for the application (updates both the application and the project catalog).
Cancel Closes the form without applying your changes (does not update the application catalog or the project catalog).
Apply Applies your changes without closing the form (does not update the application catalog, only the current project catalog).
OK Applies your changes and closes the window (does not update the application catalog, only the current project catalog).